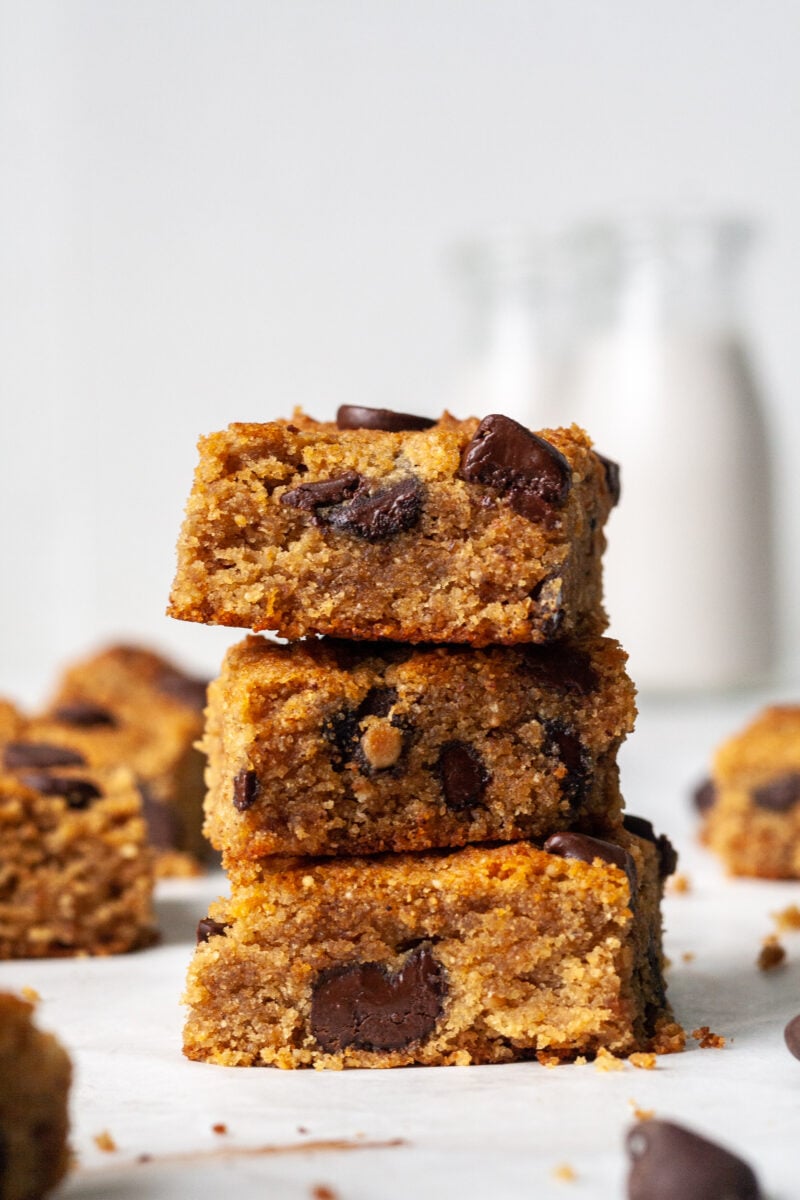
Peanut butter fans, get ready for these peanut butter blondies that will become your new favorite! These flourless peanut butter bars are the perfect blend of chewy, nutty goodness that will satisfy your sweet tooth. They are incredibly easy to whip up, with just a few ingredients, and the rich peanut butter flavor is delicious.
These flourless blondies are great as an after school snack, post-dinner treat, or birthday dessert!
Want to Save this Recipe?
Enter your email below & we'll send it straight to your inbox. Plus you'll get great new recipes from us every week!
Why You'll Love This Recipe
- These peanut butter blondies are quick and easy to make.
- Everything is mixed together in one mixing bowl.
- You probably have everything you need in your pantry already!
- Less mess means easy cleanup.
- Mix in your favorite extras like chocolate chips or nuts for a personalized touch.
- Whether for a potluck or a family treat, these blondies are always a big hit.
- They are flourless, so they are naturally gluten free.
- In addition, this recipe is dairy free and contains no refined sugar.
- Check out these Almond Flour Blondies or these Chocolate Chip Blondies for other dessert recipes!
Ingredients & Substitutes
These are the ingredients and substitutions for peanut butter blondies. Scroll down to the bottom for the entire recipe.
First, use all natural creamy peanut butter made from only peanuts and salt. Do not use peanut butter with added oil or sugar. If you are peanut free, use creamy almond butter or cashew butter.
Pure maple syrup adds the sweetness. Replace with honey if needed.
Two eggs help bind the batter together.
Vanilla extract adds a warmth of flavor.
Baking soda helps these blondies rise slightly.
A pinch of sea salt helps balance out the flavors.
Lastly, add in your favorite mix ins! We love dark chocolate chips. Chopped nuts also taste great!
Taste & Texture
These blondies have a rich and decadent peanut butter flavor balanced perfectly by the sweetness of the maple syrup.
The texture is chewy and fudgy. They are soft and thick!
How to Make
Step 1
Preheat your oven to 350°F (175°C). Line an 8x8-inch baking pan with parchment paper or lightly grease it.
Step 2
In a medium mixing bowl, whisk together the peanut butter, maple syrup (or honey), eggs, and vanilla extract until smooth and creamy.
Step 3
Add the baking soda and sea salt to the wet mixture. Stir until everything is well combined.

Step 4
If you're adding chocolate chips or chopped nuts, gently fold them into the batter.

Step 5
Pour the batter into the prepared baking pan, spreading it evenly. Bake for 20 to 25 minutes or until the edges are golden and a toothpick inserted into the center comes out clean.


Step 6
Lastly, allow the blondies to cool in the pan for at least 15 minutes before cutting them into squares. Enjoy!

Expert Tips for Success
Follow these tips and tricks to make the best peanut butter blondies.
Use a good quality, creamy peanut butter for a smooth and rich flavor. We recommend using a brand made with only peanuts and salt.
Mix the batter just until the ingredients are combined to keep the texture soft and fluffy.
Insert a toothpick into the center – if it comes out with a few moist crumbs, your blondies are ready to come out of the oven.
Flavor Variations & Add-Ins
Here are some fun ways to switch up the flavors of your peanut butter blondies!
Stir in chocolate chips or chunks for a classic chocolate-peanut butter combo.
Add chopped peanuts or walnuts for extra crunch.
Swirl in a ribbon of jam or caramel for a flavorful twist.

How to Serve & Store
Enjoy your peanut butter blondies warm for an extra gooey treat, or let them cool to room temperature for a chewier consistency.
Serve them as is, with a scoop of vanilla ice cream, or alongside a cold glass of milk.
Store your blondies in an airtight container at room temperature for up to 4 days, or freeze them for up to 2 months.
Frequently Asked Questions (FAQs)
Yes, you can use crunchy peanut butter, but the blondies will have a slightly different texture.
They are naturally gluten-free because they contain no flour.
Yes, you can make these blondies ahead of time and store them in an airtight container at room temperature for up to 4 days.
Equipment Needed
Brownie Pan: Use a high quality pan which makes such a difference! This one is high quality and bakes these peanut butter blondies evenly and thoroughly.
Pre-Cut Parchment Paper Sheets: Line brownie pan with parchment paper for easy removal and clean up.
Pyrex 3 Glass Mixing Bowls: These are my favorite mixing bowls for baking.
Pyrex Glass Measuring Cups: Use these glass measuring cups to measure your ingredients.
Check out all of our Kitchen Favorites!

You May Also Enjoy
- Almond Flour Banana Bread
- Chocolate Chip Blondies
- Almond Flour Pancakes
- Homemade Banana Pudding
- Chocolate Mug Cake
If you enjoyed this peanut butter blondie recipe, please leave a rating and comment! For more inspiration, check out my Facebook, Instagram, and Pinterest. For 5 free weekly meal plans and more free resources, sign up to receive my free newsletter! In addition, check out these Dessert Recipes!

Peanut Butter Blondies
Ingredients
- 1 cup all-natural creamy peanut butter
- ½ cup pure maple syrup (or honey)
- 2 large eggs
- 1 teaspoon vanilla extract
- ½ teaspoon baking soda
- ¼ teaspoon sea salt
- ⅓ cup dark chocolate chips
Instructions
- Preheat your oven to 350°F (175°C). Line an 8x8-inch baking pan with parchment paper or lightly grease it.
- In a medium mixing bowl, whisk together the peanut butter, maple syrup (or honey), eggs, and vanilla extract until smooth and creamy.
- Add the baking soda and sea salt to the wet mixture. Stir until everything is well combined.
- If you're adding chocolate chips, gently fold them into the batter.
- Pour the batter into the prepared baking pan, spreading it evenly. Bake for 20 to 25 minutes or until the edges are golden and a toothpick inserted into the center comes out clean.
- Finally, let the peanut butter blondies cool in the pan for at least 30 minutes before cutting them into squares. Enjoy!
Notes
- Use all natural creamy peanut butter made from only peanuts and salt.
- Both maple syrup and honey work well, but we recommend maple syrup for the best flavor.
- These blondies will be soft and gooey due to the absence of flour.
- Allow these bars to fully cool before slicing and serving.
- Store leftovers in an airtight container for up to 3 days.
- Refrigerate or freeze for longer shelf life.
-
Check out all of our Kitchen Favorites!
Nutrition Facts
Nutrition FactsPeanut Butter BlondiesAmount Per ServingCalories 152 Calories from Fat 90% Daily Value*Fat 10g15%Saturated Fat 3g19%Trans Fat 0.002gPolyunsaturated Fat 2gMonounsaturated Fat 4gCholesterol 20mg7%Sodium 152mg7%Potassium 145mg4%Carbohydrates 13g4%Fiber 1g4%Sugar 9g10%Protein 5g10%Vitamin A 30IU1%Vitamin C 0.02mg0%Calcium 33mg3%Iron 0.4mg2%* Percent Daily Values are based on a 2000 calorie diet.

Traci says
Made as a treat last night. Were a little dry, cooked 20 min. Prob would not cook as long next time. But still yummy! I prefer making my own treats and knowing what we are eating!